It’s time for some motorhomers to begin the process of putting their beloved vehicle into hibernation for the winter months. If you’re coming to the end of your touring season and are looking for a helping hand with winterising a motorhome, we’re here to help.
There are various schools of thought when it comes to winterising your motorhome. Some of us will be reaching for the best heater for a campervan and intending to continue touring during the offseason.
Other people go to great lengths to drain down all the water tanks, fit dehumidifiers and heat the interiors. They carefully lug all the cushions into their house and open all the cupboard doors, spend hours cleaning the vehicle and then cover it with a tailored cover.
Following some simple steps when you’re winterising a motorhome will mean that come spring, when you’re ready to set off on your first tour of the season and stay at one of the best motorhome sites, your ‘van will be ready to go. From the essential cleaning tasks to carry out to the motorhome security steps to follow, we’re here to talk you through what you need to know.
Practical Motorhome is supported by its audience. When you purchase through links on our site, we may earn an affiliate commission. Learn more.
Winterising a motorhome:
Protecting your motorhome with a cover
Tyre maintenance
Clean up the interior
Draining water from a motorhome
Toilet cassette maintenance
Where to park your motorhome
Should you idle your motorhome?
Maintaining your battery
Keeping your ‘van safe
Don’t forget the fridge
Soft furnishings
Staying dry
Remember the keys
A final checklist
Motorhome winterisation: the steps involved
Protect your motorhome with a cover
After thoroughly cleaning a motorhome and ensuring it’s spotless, it will be time to cover your ‘van. For this, you’re going to want the best motorhome cover – this will be well-made to ensure your leisure vehicle is protected from the elements during the colder months.
We’d advise steering clear of cheaper, low-quality options. You could inadvertently end up damaging your ‘van with such a product, as the abrasive material they’re made with flapping against your motorhome in the wind could impact the panel finish.
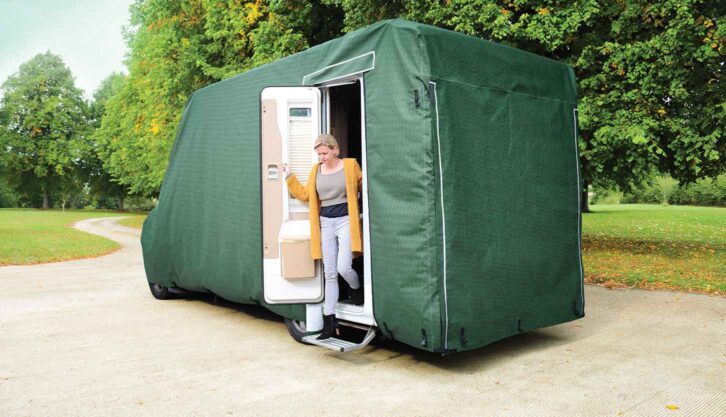
Instead, the best options will be made with the right materials and fit your ‘van well. Brands to look out for include Specialised Covers or Protec, which both offer custom-made covers, which fit your motorhome’s exact dimensions. Providing a durable waterproof exterior and made with breathable materials so moisture can escape, they also offer soft-touch linings, to prevent damaging your ‘van’s exterior.
When you think of it like that, it’s easy to see why you need a motorhome cover.
They can cost between £300 to £600, so they’re not cheap. We’d suggest thinking of a cover as an investment – one which helps to protect your pride and joy and also helps it to maintain its value, should you decide to sell it on down the line. However, a universal-fit cover is another option if you only have a limited budget, retailing for around £150. These can still offer good all-round protection.
Then you’ll just need to make sure you know how to fit a motorhome cover.
Tyre maintenance
Looking after your tyres is another important part of winterising a motorhome. Rubber compounds deteriorate when they are exposed to sunlight and strong artificial light with a high UV content. This is because the protective waxes in the rubber dry out, leaving the surface vulnerable to degradation.
Rarely used tyres, stored outside, are particularly vulnerable, and the damage manifests itself as fine crazing and deeper cracks.
I treat my tyres with Meguiar’s Endurance Tyre Gel. This not only makes them look great, it will also help protect against UV damage and browning – and, in theory, should keep the tyres in better condition.
When you are checking your motorhome tyres, have a look at the production date, which is printed on the sidewall.
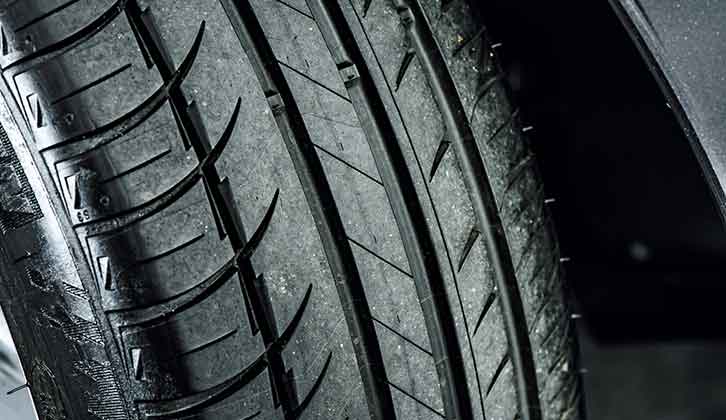
It’s a four-digit number, usually in a lozenge. For example, ‘1219’ means a tyre made in the 12th week of 2019.
By applying the major touring Clubs’ guidelines of replacing rubber at five years old, this tyre has less than a year of advisable use left. You could leave it on over the winter, but be prepared to replace it before you tour next year.
If your tyre is in excellent condition, with no wear, cracks or damage, and plenty of tread depth, the Clubs suggest seven years as a maximum lifespan. Seek the advice of your dealership about this the next time that you have your vehicle serviced.
Finally, check your motorhome tyre pressures when you park up, as underinflated tyres left for extended periods can cause flat spots, which will increase vibrations when you are on the road.
Clean up the interior
Another important step when you’re winterising a motorhome will be cleaning the interior of your ‘van. Wipe down all of the kitchen surfaces and clean the interior of the fridge with disinfectant wipes or a spray.
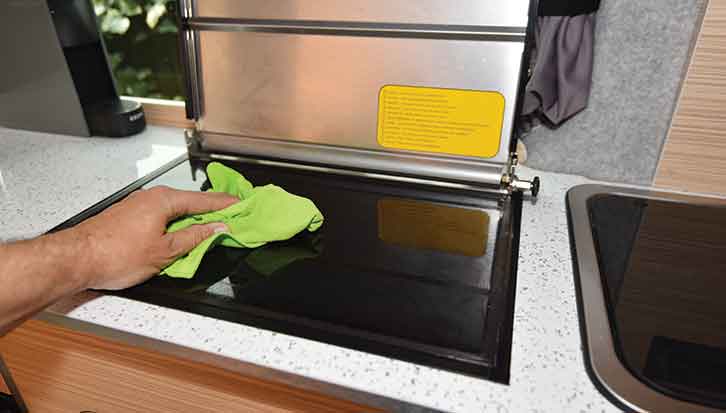
Don’t forget to give your motorhome a thorough vacuum too, taking care to get rid of any crumbs and bits of food that could otherwise attract vermin to your ‘van. The best motorhome vacuum cleaner will help here, providing lightweight portability and a good runtime for getting into all those nooks and crannies in a ‘van.
If you fail to do this and end up with rodents in your ‘van, you could face severe damage if they start chewing through your electric cables, water pipes or even the upholstery.
Where you’re thinking of storing a motorhome can be a particular issue. For instance, if it’s on a farm, it can be more of a problem, so take extra care to seal up all cable access holes in the bottom of your ‘van.
Mice can get through tiny holes the same diameter as a pencil, and have even been known to chew through the plastic mesh that covers the gas drop-out vents. This may be the case, but definitely avoid sealing these with tape, because you want air circulating through the stored vehicle.
Always try to avoid parking on long grass or anything that could make mouse access to your ’van easier.
Next, thoroughly wash down the shower and handbasin, ensuring all the water drains away, and empty the waste- and fresh-water tanks. Don’t forget to empty the boiler, too.
Remember to remove any hair from plugs and pipes, especially if you have long-haired family members. This might require the (gentle) use of a plunger!
Clean the toilet, but avoid coating the bowl with strong chemical cleaners and leaving them in place, because this could damage or discolour the surface if left for many months, especially if the bowl is plastic.
If you’re looking to give the exterior a freshen up too, make sure you don’t forget the motorhome roof cleaning task either.
Draining water from a motorhome
Peter Rosenthal is on hand to explain the importance of draining water when you’re winterising a motorhome. He says: “Water – and specifically the frozen variety – is the biggest enemy of your motorhome. It loves creeping along seams, dripping down wooden battens and soaking into floorboards. Damp causes mould and rot to form, so keeping the vehicle dry and protected is an essential pre lay-up job.”
“While a proper fitted cover is a wise investment, the most essential thing to do is to drain down your water tanks and any other device plumbed into the water system that can contain or trap water. This includes water tanks, pumps, filters, boilers, taps, hoses and pipes. All motorhomes have drain-down valves fitted to their waste and fresh water tanks, as well as in their boilers.”
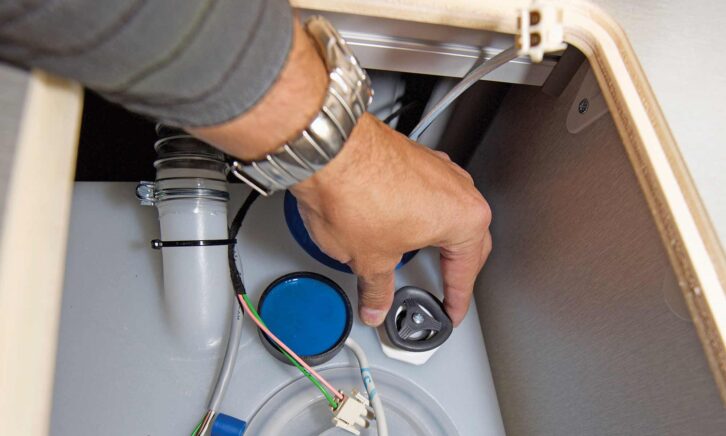
“Open all these and let the water escape. Leave them open and open all the taps (make sure the water pump is switched off – pull the fuse if there isn’t a separate switch).”
“Unscrew any aftermarket water filters and make sure they don’t contain water (this is probably a good time to replace the filter element). Some people additionally use a compressor to blow any water droplets clear of the hoses and pipes, but this isn’t essential. The key thing is not to have any trapped water contained in any vessel that can freeze. Trapped water in a hose that is open at both ends will freeze along its length, rather than trying to expand out sideways.”
Toilet cassette maintenance
Having cleaned the cassette (make sure you know how to empty a motorhome cassette toilet, first!) and prepped it with some toilet chemical solution, consider lubricating the slide valve to keep it in tip-top condition.
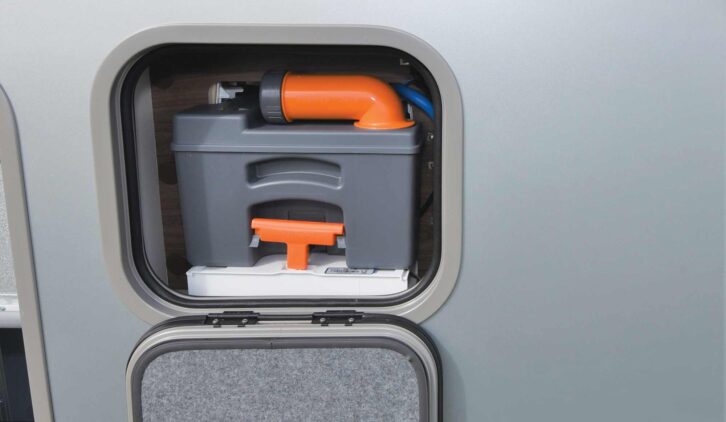
This is a simple job when you’re winterising a motorhome, involving a quick spray or rub with silicone lubricant – some motorhomers even use olive oil. I give the slide-out handle mechanism a quick blast as well. This is also a good moment to give the unit a check over.
Where to park your ‘van
I’ve already recommended avoiding parking in long grass as it can help rodents get in your ‘van. As well as this, if you can, I’d also avoid parking a campervan or motorhome under trees: they will invariably deposit sap onto the roof and increase the chance of corrosive bird droppings landing on it, too.
That’s before you even start to consider the potential damage from falling branches in a winter storm.
Always aim to park your vehicle on a dry, well-drained, hard surface.
Should you idle your motorhome when you’re winterising it?
The great idling debate. It’s one thing that we hear about quite a lot, with some people liking to start-up their vehicle and leave it idling for 10 minutes or so every couple of weeks over winter. The thinking is that this helps prevent the belts and cambelt from sitting in one position and eventually damaging it.
However, Peter Rosenthal explains: “This is quite possibly the worst thing you can do to an engine. Most engine wear occurs during the start-up phase and by keeping the vehicle idling for long periods there’s a slow build up of temperature, which prolongs the warm-up phase.”
“It’s far better to immediately drive the vehicle so that the engine reaches operating temperature more rapidly. Idling a diesel, or only driving it for a couple of miles and then parking it up again for weeks, is a surefire way to cause excess carbon to build up and virtually guarantees emission system problems in the future.”
“Lack of revs and short distance driving is highly unsuitable for modern DPF-equipped diesel engines. Driving them is a good idea – it also rotates the tyres and avoids them developing flat spots – but make sure you do at least 20 miles or so and ideally get the engine nice and hot with a decent cruise on a dual carriageway or motorway.
” The best example of this issue was a vehicle used by an energy generation firm locally. This modern pick-up was bought new in 2020 and spent its entire life patrolling a coal-powered power station and idling all day. By the time it had covered just 15,000 miles it was a regular visitor at the local garage and had persistent emissions faults due to its use.”
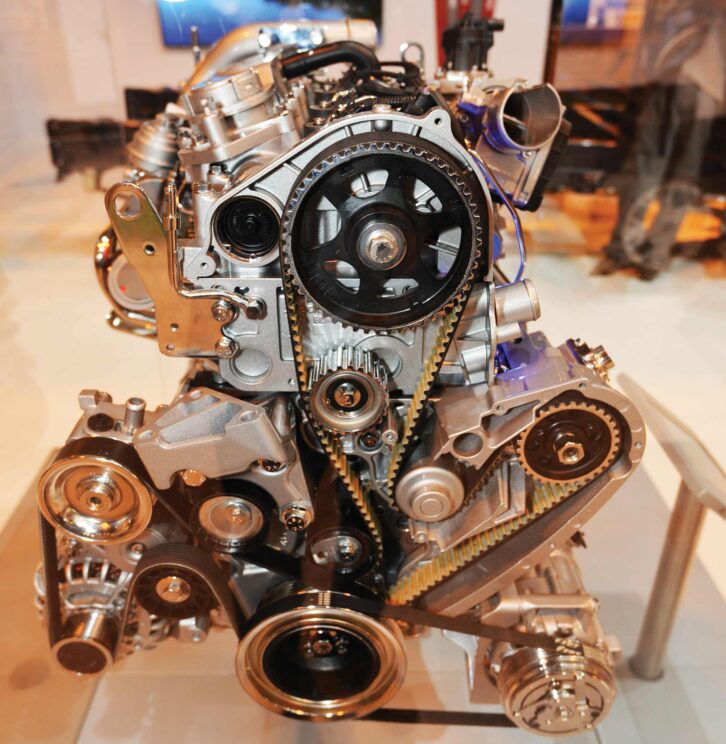
“In the end they refused to warranty it because it was being used outside its operating parameters. The engine suffered all manner of issues and the dash always sported warning lights. Idling engines does them no good at all – so please stop doing it!”
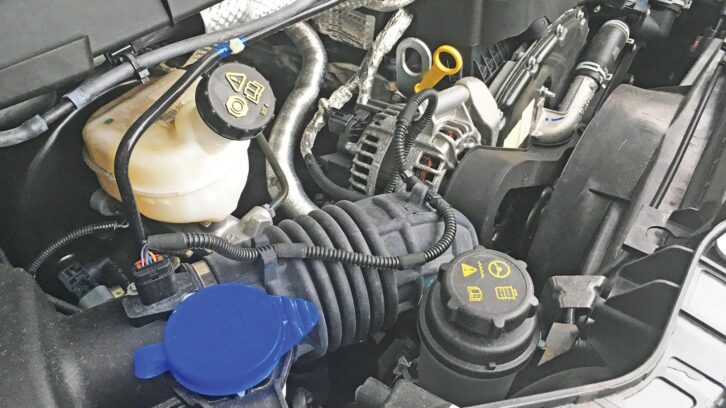
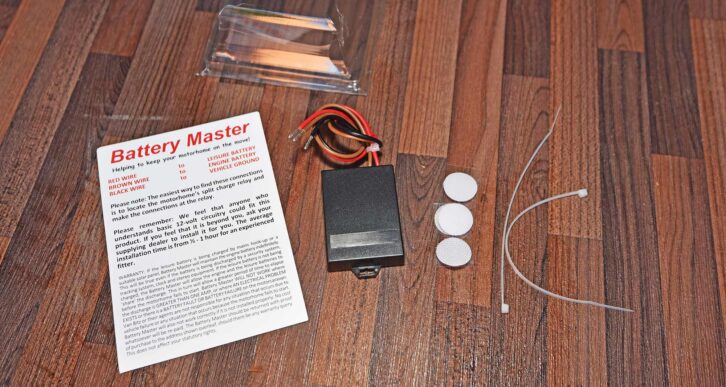
Maintain your battery
Even the best campervan leisure battery will need topping up every so often, even if alarms and trackers don’t consume massive amounts of battery charge.
After all, batteries can also start to lose charge over winter as campervan solar panel efficiency drops off a cliff in the UK in winter, even if you’ve chosen the right size of solar panel – this is due to shorter daylight hours, the angle of the sun and dull days with cloud cover.
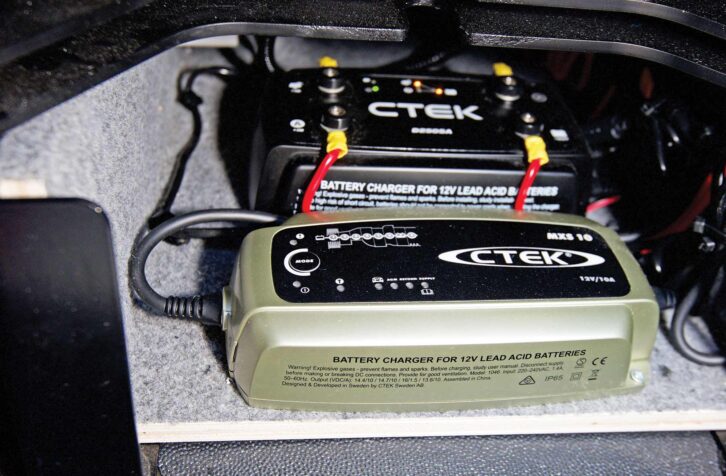
Peter Rosenthal explains: “Just plug your vehicle into the mains over winter and make sure your charging system also tops up the vehicle battery at the same time (if it doesn’t – and not all motorhomes do – then you can buy all manner of automatic charging gadgets or simply add a second battery charger and plug it into a mains socket on the van).”
“Do nothing with the batteries over winter and it’s extremely unlikely that your vehicle will start in the spring. Modern vehicle ECUs, immobilisers, alarms and trackers all sip away at the battery voltage and few can last more than three weeks without being topped up.”
“Some people disconnect the battery leads to avoid drain down, but this also deactivates the alarm and tracker which can invalidate or reduce your insurance payout should the vehicle be stolen. So it’s not wise to do this.”
It seems like basic common sense to fit a full arsenal of security devices, such as the best motorhome wheel clamp, when storing your vehicle. You might also find that your insurance is invalidated if you do not have certain security devices fitted.
Ideally, you should start the engine every month and allow it to run at idle for a couple of minutes. Move the ’van slightly while you’re there, so that the tyres do not develop flat spots.
Something worth highlighting though. If you’ve opted to get a bespoke cover made, make sure it includes a clear window section for where the solar panel will be positioned. This will ensure it can stay topped up after you’ve got your cover in place.
For those who don’t have a cover, you will have to keep an eye out for tree sap, bird muck and general grime which could all diminish the charging abilities of your solar panel.
Don’t miss our tips on what you can do to extend the life of a motorhome leisure battery and how to avoid a flat motorhome battery, either.
Don’t forget the fridge and cupboards
Another area you’re not going to want to overlook when you’re winterising a motorhome is the fridge.
Peter Rosenthal explains: “When my campervan was recently laid up in France for several weeks following a breakdown, in all the excitement, I completely forgot to empty the fridge. This was a very bad oversight. Opening the door several (very warm) weeks later revealed a horror show of green furry items together with a gag-inducing odour that was an interesting cross between a corpse and a Camembert. David Cronenberg would have been proud.”
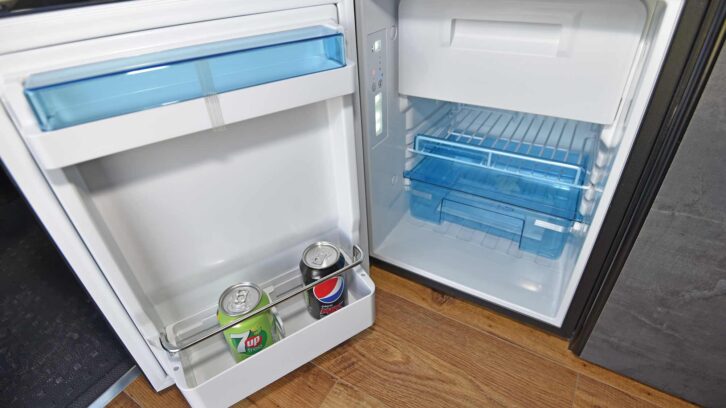
“So make sure that you switch off the motorhome fridge, empty it of all food and drink, give it a good going over with an antibacterial spray and leave the door partially open on the ‘vent’ setting.”
“It’s a good idea to empty the cupboard of foodstuffs too when you’re winterising a motorhome, even the dried packet food, as it gives you a chance to clean behind and bin the out of date stuff. That ‘emergency tin’ that never gets eaten, as it looks so unappealing and is eventually retrieved from the depths of the cupboard with a layer of rust on it.”
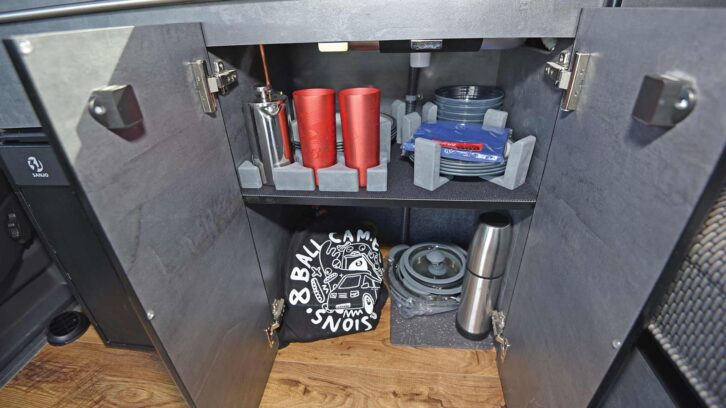
“Cleaning out the cupboards will also reduce the chance of rodents being attracted by foodstuff aromas.”
Soft furnishings
If you have the option and are able to, you should remove either some of or all of the upholstery in your ‘van during the motorhome winterising period, instead storing it in your warmer home.
This has two benefits. Firstly, it helps to keep the soft furnishings in good condition, and secondly, it can be a further deterrent to thieves. It’s also worth bearing in mind a settee cushion for your ‘van can end up costing a fair bit to replace.
Some people close the silver-backed blinds when not using their vehicle, but it’s perhaps better not to.
Potential thieves won’t be able to see that there are no valuable contents inside the ’van, and reflective blinds will repel all of the sun’s heat, keeping the interior cooler – and quite possibly, damper. Blind mechanisms can also become damaged if left in the ‘closed’ position for long periods.
Staying dry
Some people swear by moisture traps to keep their motorhome’s interior drier. These contain moisture-absorbing crystals and are fairly cheap. Those living in wetter areas of the country might find them beneficial and there are some suggestions in our best motorhome dehumidifier guide if you’re looking for some ideas.
Remember your keys!
At the end of the touring season, make sure you have all your keys and remotes in a safe place, away from the vehicle.
These might include the motorhome keys, security lock keys, the locking wheel-nut adaptor, bike-rack keys, the remote controls for your TV and air-con, and more. A clearly marked plastic storage box is ideal, and should be kept somewhere accessible but secure, away from the motorhome.
While you’re doing this, make a note of your key numbers, in case you ever need replacements, and you could also remove batteries from remote controls.
The final checklist when winterising a motorhome
- Turn off your gas bottles and consider removing them from the motorhome. Gas bottles are very valuable!
- Ensure that all of the windows and rooflights are securely closed.
- Treat all seams of sealant with great care while you are cleaning the ’van.
- Remove any valuables.
The verdict on motorhome winterisation
There’s no single method to winterise your motorhome. The key thing though, is to make sure the water is drained down and not rely on the automatic boiler draining feature to save your water system from frost damage. And don’t forget to plug the batteries into the mains to ensure the vehicle will start again next spring!
Written with contributions from Peter Rosenthal
Future Publishing Limited, the publisher of Practical Motorhome, provides the information in this article in good faith and makes no representation as to its completeness or accuracy. Individuals carrying out the instructions do so at their own risk and must exercise their independent judgement in determining the appropriateness of the advice to their circumstances. Individuals should take appropriate safety precautions and be aware of the risk of electrocution when dealing with electrical products. To the fullest extent permitted by law, neither Future nor its employees or agents shall have any liability in connection with the use of this information. Double check any warranty is not affected before proceeding.
If you’ve enjoyed reading this article, why not get the latest news, reviews and features delivered direct to your door or inbox every month. Take advantage of our brilliant Practical Motorhome magazine SUBSCRIBERS’ OFFER and SIGN UP TO OUR NEWSLETTER for regular weekly updates on all things motorhome related.
Leave a Reply